1. Removing Chalk Dust: The Essential First Step
Removing Chalk Dust: The Essential First Step
If you own a chalkboard, you’re likely familiar with the pesky problem of chalk dust. While it may seem harmless, the accumulation of chalk dust can actually affect the longevity and cleanliness of your chalkboard. As such, it’s important to regularly remove chalk dust as the essential first step in maintaining and preserving your chalkboard.
Why is removing chalk dust important?
Chalk dust not only detracts from the overall appearance of your chalkboard, but it can also impact the performance of the writing surface. When chalk dust builds up, it can be difficult to write or draw on the board, resulting in a less satisfying experience. Additionally, if left unaddressed, chalk dust can seep into the pores of the chalkboard, making it even more challenging to clean in the future.
Methods for removing chalk dust
- Erasing: The most common method for removing chalk dust is simply using an eraser. Gently wipe the eraser across the surface of the board, paying extra attention to areas with heavy dust accumulation.
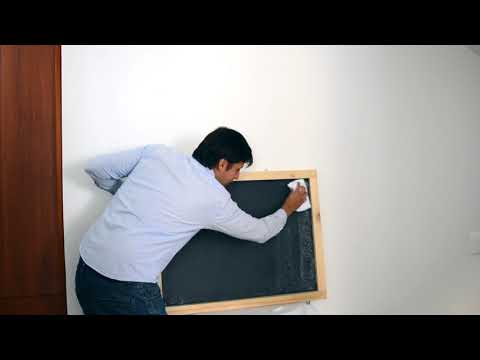
- Damp cloth: For stubborn chalk dust or hard-to-reach corners, a damp cloth can be used to wipe away the dust. Be sure to wring out the cloth well to avoid introducing excessive moisture to the chalkboard.
- Vacuuming: If your chalkboard is especially large or frequently used, using a vacuum cleaner with a brush attachment can make the removal process faster and more efficient. Remember to set the vacuum to a low suction setting to avoid damaging the surface of the board.
By incorporating regular chalk dust removal into your chalkboard maintenance routine, you can ensure a clean and smooth writing surface. In addition to removing the dust, it’s also important to periodically deep clean your chalkboard to remove any stubborn stains or residue. Stay tuned for our upcoming blog post on effective deep cleaning techniques for chalkboards!
2. Erasing Stubborn Marks: Tried and Tested Techniques
Removing ink stains
Ink stains can be a nightmare to erase, especially if they have seeped deep into the material. However, with the right techniques, you can successfully remove even the most stubborn ink marks. One effective method is to dab the stain with rubbing alcohol using a clean cloth. The alcohol helps to break down the ink particles, making them easier to remove. Another option is to apply a small amount of hairspray to the stain and let it sit for a few minutes before wiping it away with a damp cloth. Remember to test these methods on a small, inconspicuous area first to avoid any damage to the material.
Tackling crayon marks
Crayon marks on walls or furniture can be a headache, especially when traditional cleaning methods don’t seem to do the trick. To effectively remove crayon marks, try using a mixture of baking soda and water. Create a paste by combining equal parts baking soda and water, then gently scrub the marks with a soft cloth or sponge. The baking soda acts as a natural abrasive, helping to lift the crayon wax off the surface without causing damage. For particularly stubborn marks, you can also try using a non-gel toothpaste and a toothbrush to gently scrub the area.
Eliminating tough carpet stains
Carpet stains can be one of the most challenging marks to remove, especially if they have been left untreated for a while. When dealing with tough stains like wine or coffee, it’s essential to act quickly. Blot the stain with a clean cloth or paper towel to absorb as much liquid as possible. Avoid rubbing the stain, as this can spread it further. For a homemade carpet cleaner, mix equal parts vinegar and water and pour it onto the stain. Let it sit for a few minutes before blotting it with a clean cloth. If the stain persists, you may need to consider professional carpet cleaning services.
Remember, different materials and surfaces may require different techniques for stain removal. Always test any method on a small area first and follow the instructions carefully. With a bit of patience and persistence, you can successfully erase stubborn marks and keep your belongings looking clean and pristine.
3. Using Natural Cleaning Solutions: Eco-friendly Options
Using natural cleaning solutions is an excellent way to not only keep your home clean but also to reduce your environmental impact. Eco-friendly options are becoming increasingly popular as people are becoming more conscious of the chemicals they use in their everyday lives. By opting for natural cleaning solutions, you can ensure that your home is free from harmful toxins while also doing your part in protecting the environment.
One of the most common natural cleaning solutions is vinegar. Not only is vinegar readily available and affordable, but it is also highly effective in eliminating bacteria and germs. To use vinegar as a cleaning solution, simply mix equal parts of vinegar and water and use it to clean surfaces such as countertops, windows, and even floors. Additionally, vinegar can be used to remove odors, making it a versatile and eco-friendly option.
Another natural cleaning solution that you can consider is baking soda. Baking soda is not only a fantastic deodorizer but is also great at removing stubborn stains. When combined with water, baking soda forms a paste that can be used to clean various surfaces, including kitchen appliances, bathroom fixtures, and even clothing stains. Additionally, baking soda can be used to absorb odors by placing an open box in your fridge or sprinkling some on your carpets before vacuuming.
Essential oils are another eco-friendly cleaning solution that can add a pleasant scent to your cleaning routine. Oils like tea tree, lavender, and lemon have antimicrobial properties, making them excellent options for disinfecting surfaces. You can add a few drops of your preferred essential oil to your natural cleaning solution or use them in a diffuser to create a fresh and clean-smelling home.
By using natural cleaning solutions like vinegar, baking soda, and essential oils, you can ensure that your home is clean, safe, and eco-friendly. These options provide effective alternatives to harsh chemicals while also reducing your carbon footprint. Incorporate these eco-friendly cleaning solutions into your routine and enjoy a cleaner and greener home.
4. Restoring a Stained Chalkboard: Expert Tips and Tricks
When it comes to restoring a stained chalkboard, it’s important to have a plan of action in place. Whether you’re dealing with years of buildup or stubborn stains, these expert tips and tricks will help you bring your chalkboard back to its former glory.
Assess the Damage
Before you begin the restoration process, take a close look at the condition of your stained chalkboard. Are there areas of heavy staining or deep discoloration? Identifying the extent of the damage will help you determine the best approach for restoration.
Use the Right Tools
Having the right tools can make a world of difference in the success of your chalkboard restoration. A soft cloth or sponge, mild detergent or chalkboard cleaner, and a gentle scrub brush are essential for gently removing stains without damaging the surface of the chalkboard.
Additionally, consider using a homemade cleaning solution that consists of equal parts of water and vinegar. This natural solution is safe to use and can effectively remove tough stains without harsh chemicals.
Work in Sections
Restoring a stained chalkboard can be a time-consuming task, so it’s crucial to work in manageable sections. This approach allows you to focus on one area at a time and ensures a thorough and even cleaning process. As you work, be sure to rinse the cleaned section thoroughly and dry it before moving on to the next one.
Remember, patience is key when it comes to restoring a stained chalkboard. Take your time, follow these expert tips and tricks, and you’ll be amazed at the transformation your chalkboard undergoes.
5. Best Practices for Maintaining a Clean Chalkboard
5. Mejores prácticas para mantener una pizarra limpia
¿Eres un profesor o presentador que usa pizarras de tiza? Si es así, sabes lo importante que es tener una pizarra limpia y legible para transmitir información de manera efectiva. Mantener una pizarra limpia no solo mejora la apariencia visual de tus enseñanzas, sino que también facilita a los estudiantes o audiencia seguir y comprender el contenido. Aquí hay algunas mejores prácticas que pueden ayudarte a mantener una pizarra limpia y organizada:
Limpia tu pizarra regularmente
Una de las mejores prácticas para mantener una pizarra limpia es limpiarla regularmente.
Programa un tiempo específico al final de cada clase o presentación para limpiar la pizarra. Utiliza un borrador de calidad y agua limpia para eliminar todo el polvo y los residuos de tiza. Asegúrate de secar la pizarra completamente antes de comenzar a escribir en ella nuevamente.
Utiliza técnicas de escritura adecuada
La forma en que escribes en la pizarra también puede afectar su limpieza y legibilidad.
Escribe con calma y evita aplicar demasiada presión para evitar que la tiza se rompa o se desmenuce. Mantén las letras y las líneas claras y definidas para que sean fáciles de leer.
- Cambia la tiza regularmente: A medida que la tiza se desgasta, puede volverse difícil de leer y dejar un rastro de polvo. Cambia la tiza regularmente para asegurarte de que siempre esté en buenas condiciones.
- Utiliza un paño húmedo: Para eliminar manchas persistentes o marcas difíciles de borrar, usa un paño húmedo y frota suavemente sobre la superficie de la pizarra. Esto ayudará a mantenerla limpia y legible.
Esperamos que estas mejores prácticas te ayuden a mantener una pizarra limpia y organizada en tus próximas clases o presentaciones. Con una pizarra en buenas condiciones, podrás comunicar tus ideas de manera más efectiva y asegurarte de que tu audiencia pueda seguir sin dificultades. ¡No subestimes el poder de una pizarra limpia!